Automate your lead generation needs using Webhooks integrated with LeadGen. #
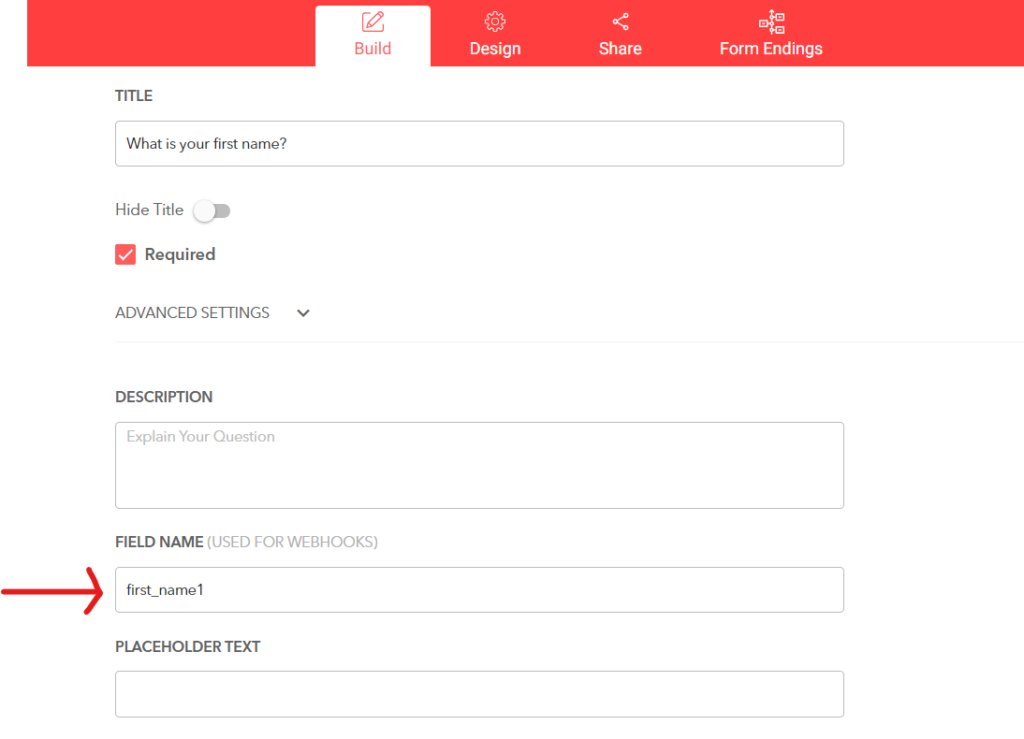
To integrate forms via webhooks, start by giving all your questions field name labels. For example, when asking for first name, you can name your field name “first”.
Important: Only use lowercase field name text and avoid spacing, e.g. use “email_address” instead of “email address”
When setting up your webhook integration later one, you will continue working with those field names.
Once you built your form and assigned a field name to each question, it’s time to build the Webhook. Go to “Integrations” from the form overview page.
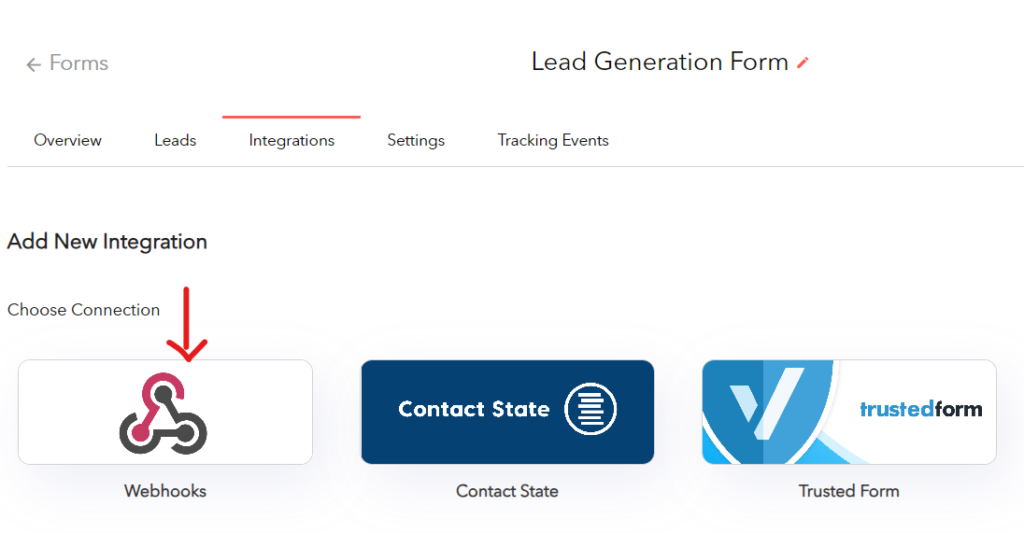
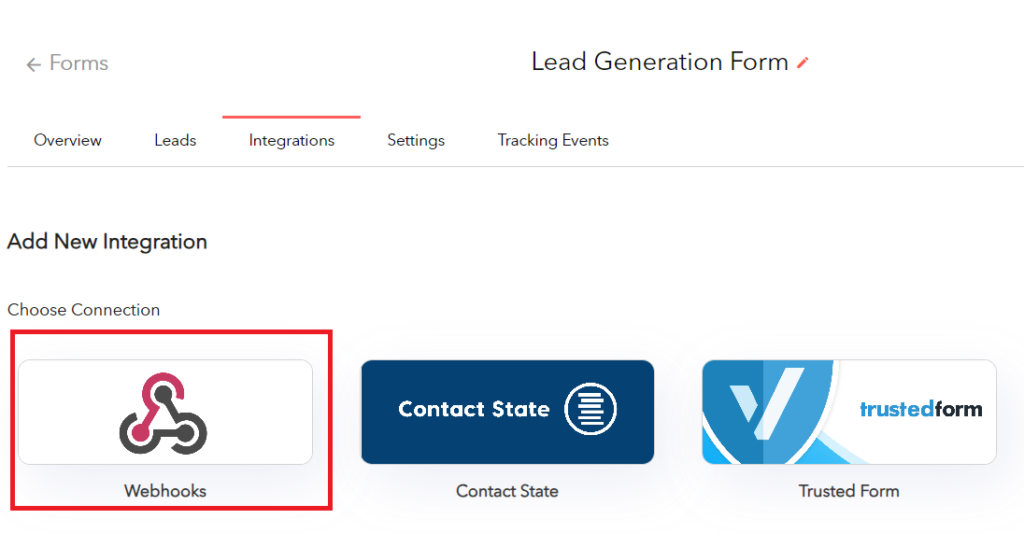
Create a new webhook by choosing Webhooks from the list of integrations.
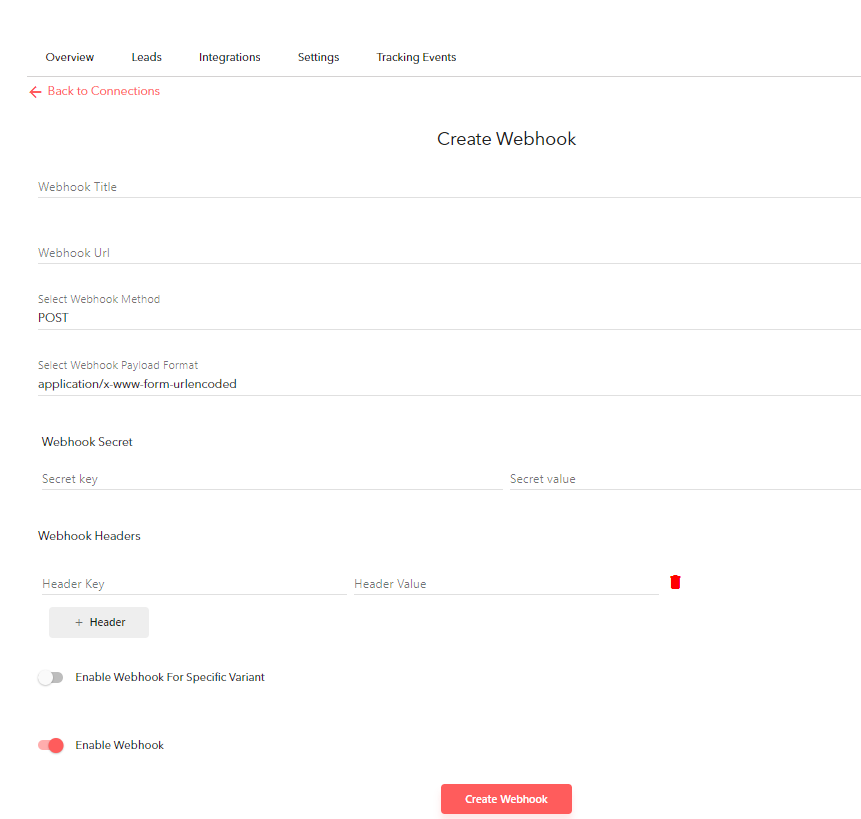
Next, you can add a few details about your newly created webhook. It’s a good idea to start with the title, as this will help you identify it later in the process. Leave the webhook URL blank, for now. You will come back to it with a URL from Zapier.
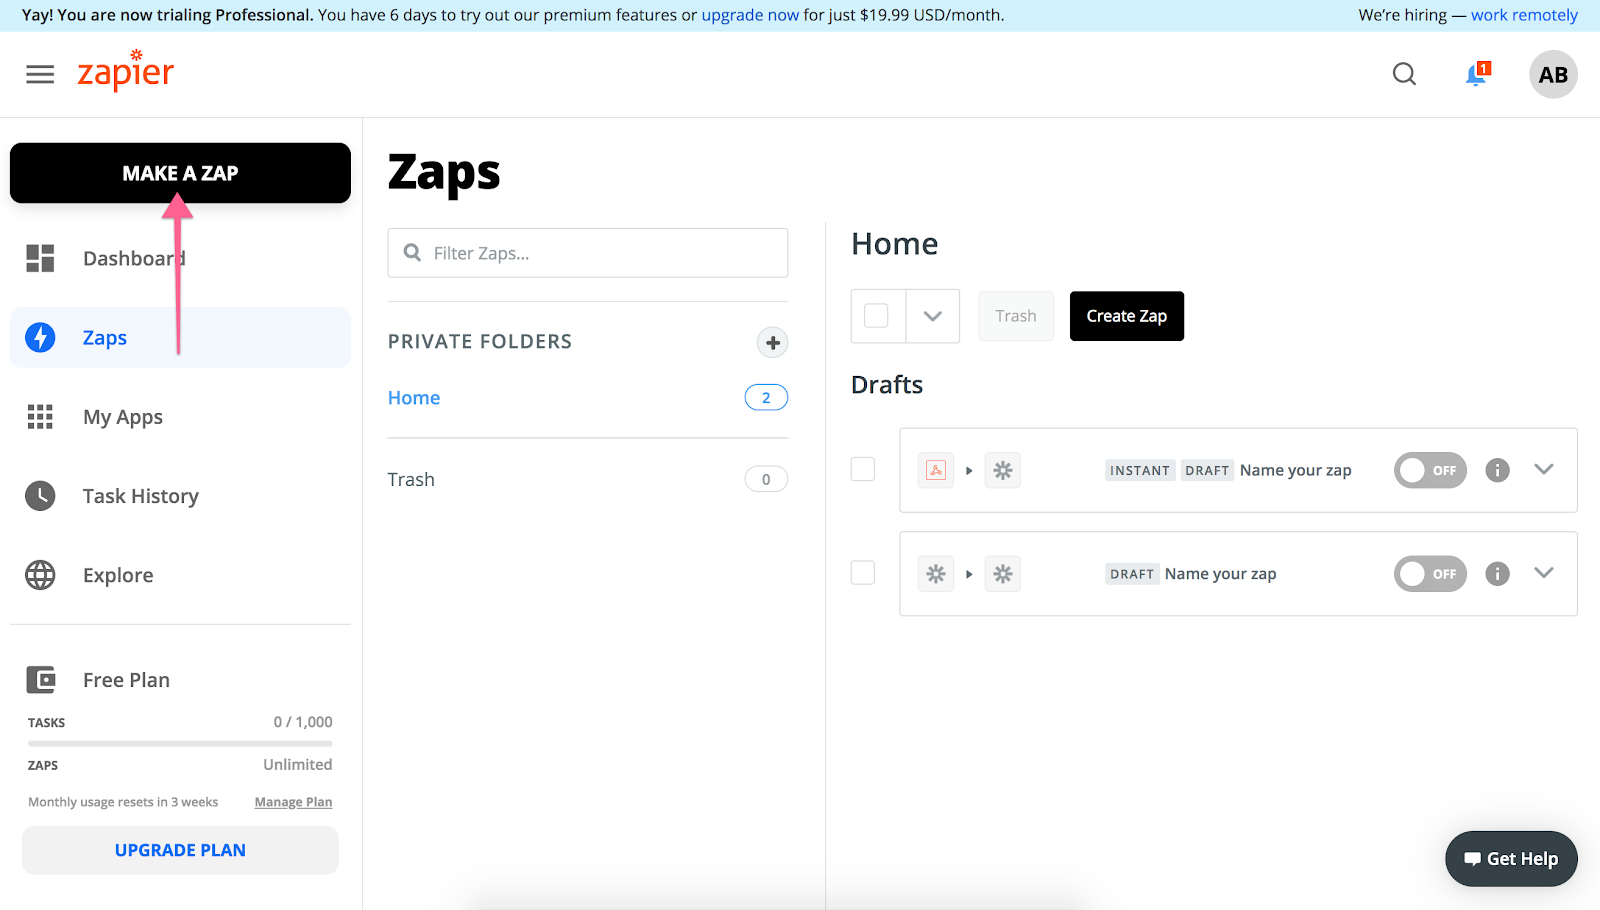
Next, go to Zapier.com, log in with your account, and use the button in the top left corner to create a new Zap.
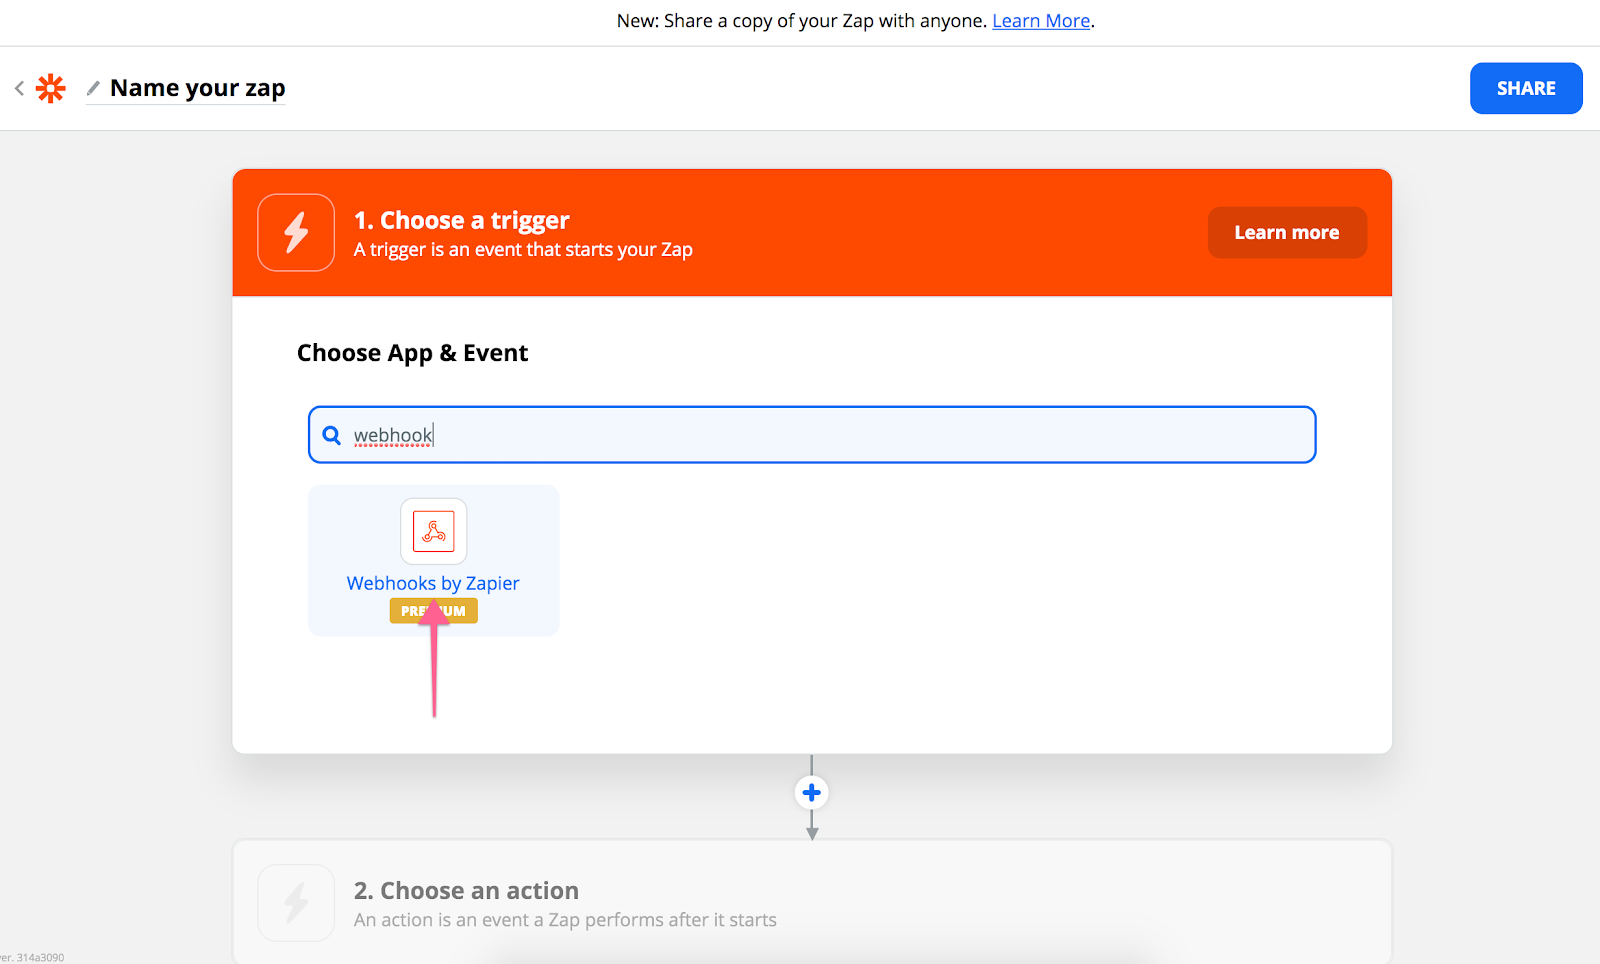
First, you need to go through one of the most important steps: Selecting the trigger. We’re talking about the event that starts your Zap. To select your trigger, you need to search and click on “Webhooks by Zapier.”
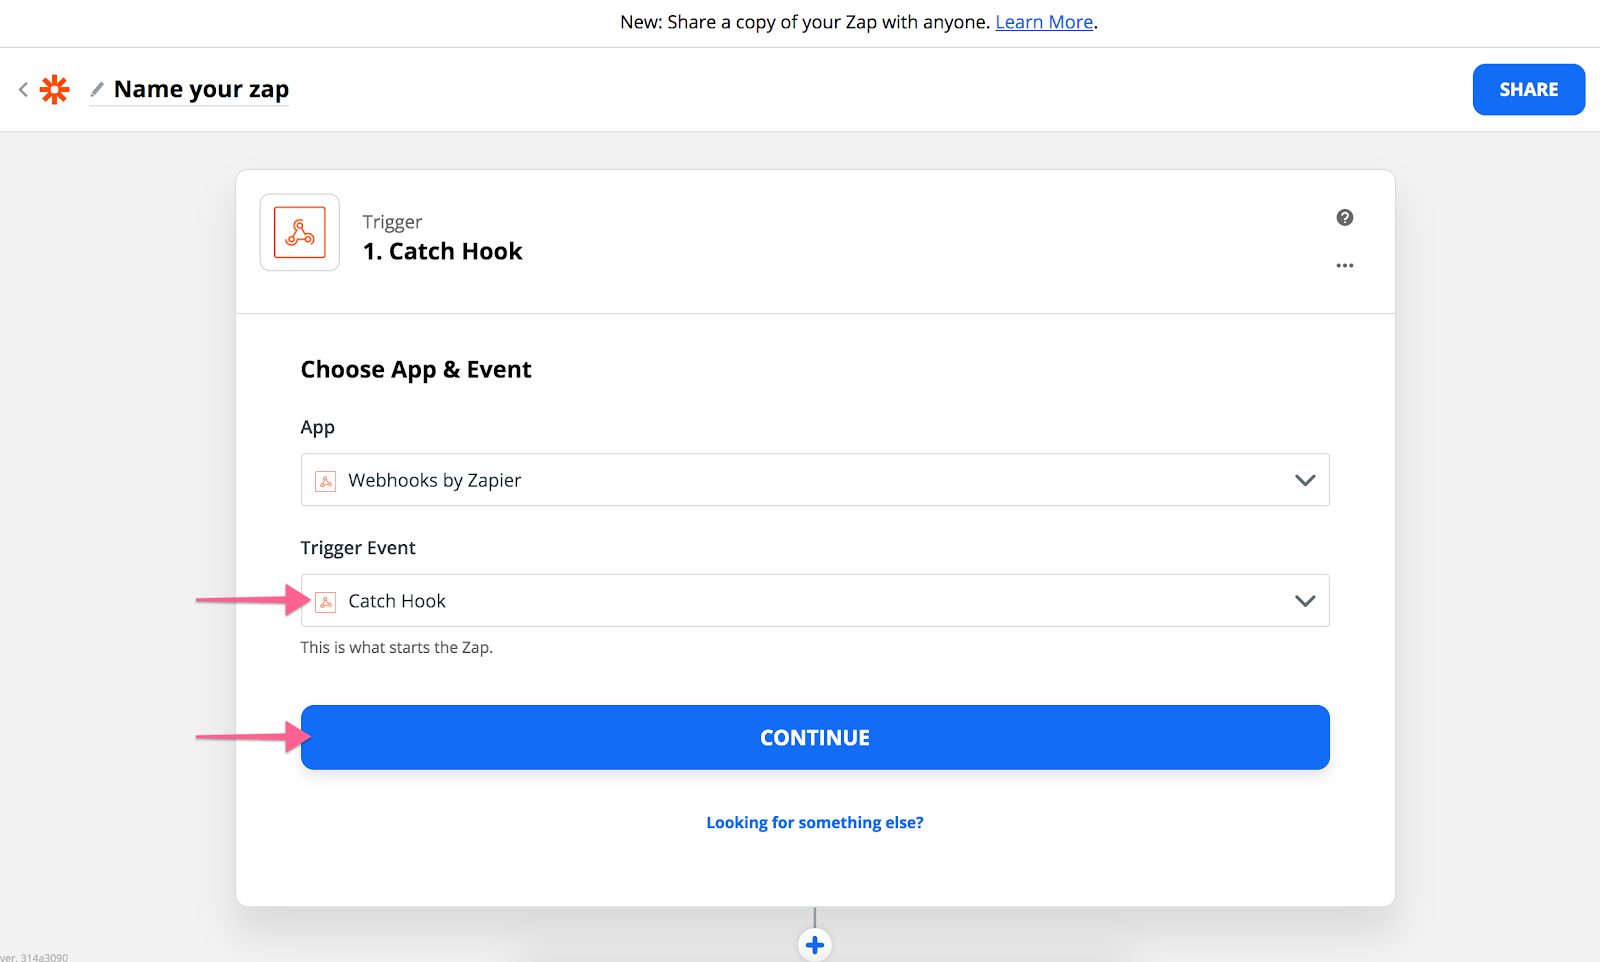
Now it’s time to choose the trigger. From the “Trigger event” dropdown menu, select “Catch Hook” and click Continue. Don’t forget to name your Zap so that you can find it with ease later on.
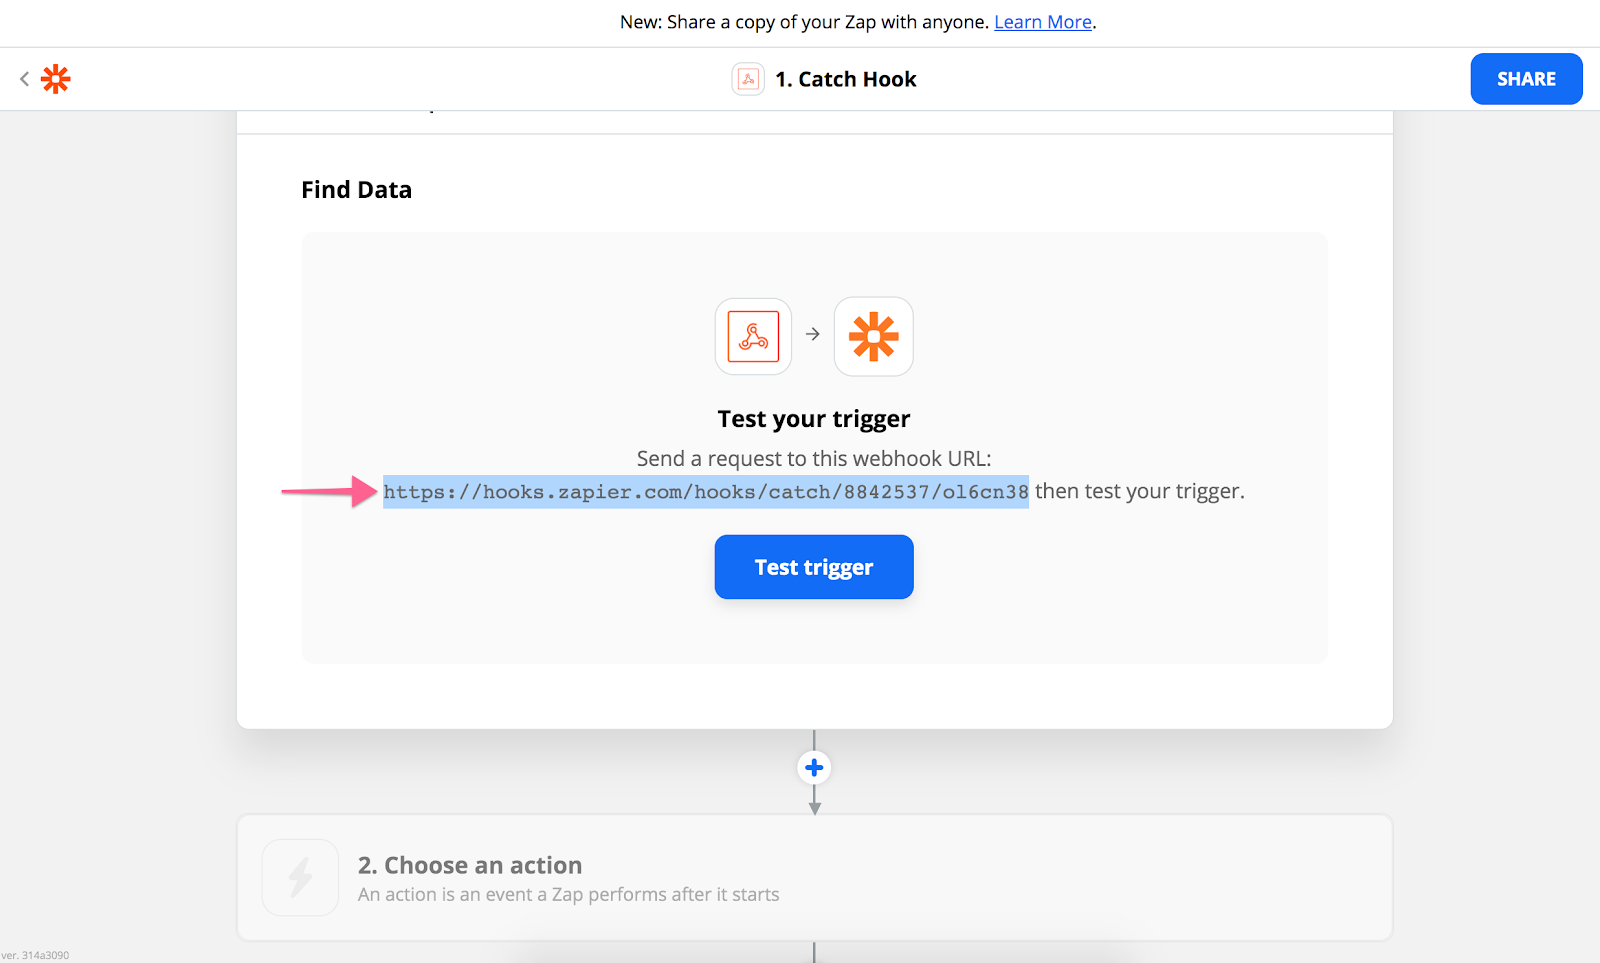
After the new Zap is created, a custom webhook URL will be created. Copy the custom webhook URL and save it.
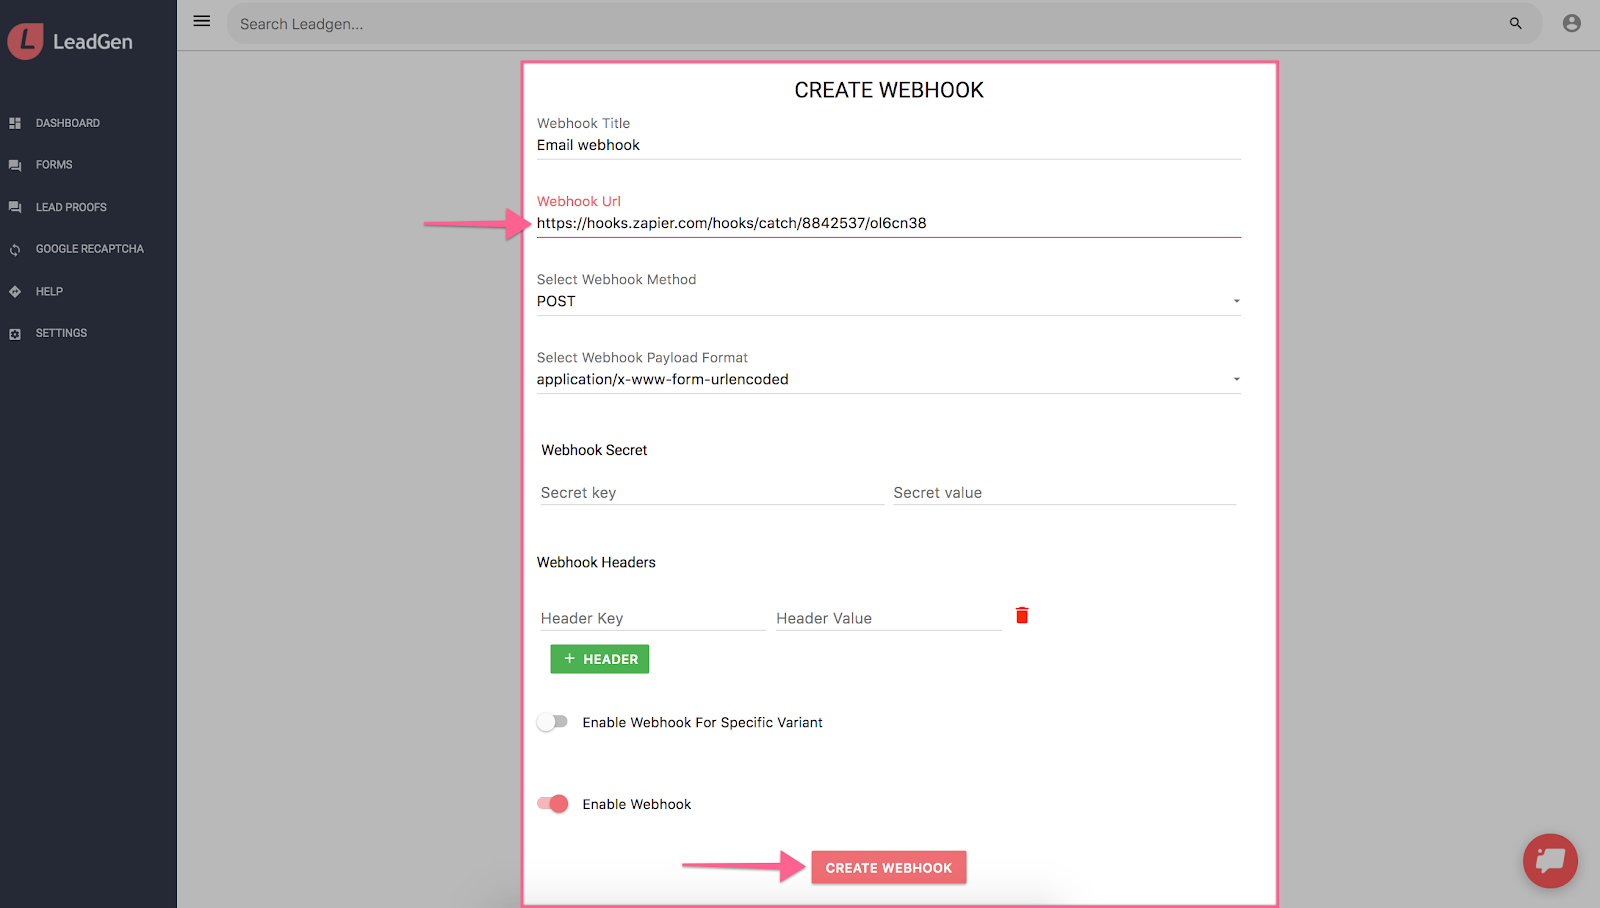
Go back to LeadGen, and in the Webhook URL field, paste the one you just saved in Zapier and click on “Create webhook.”
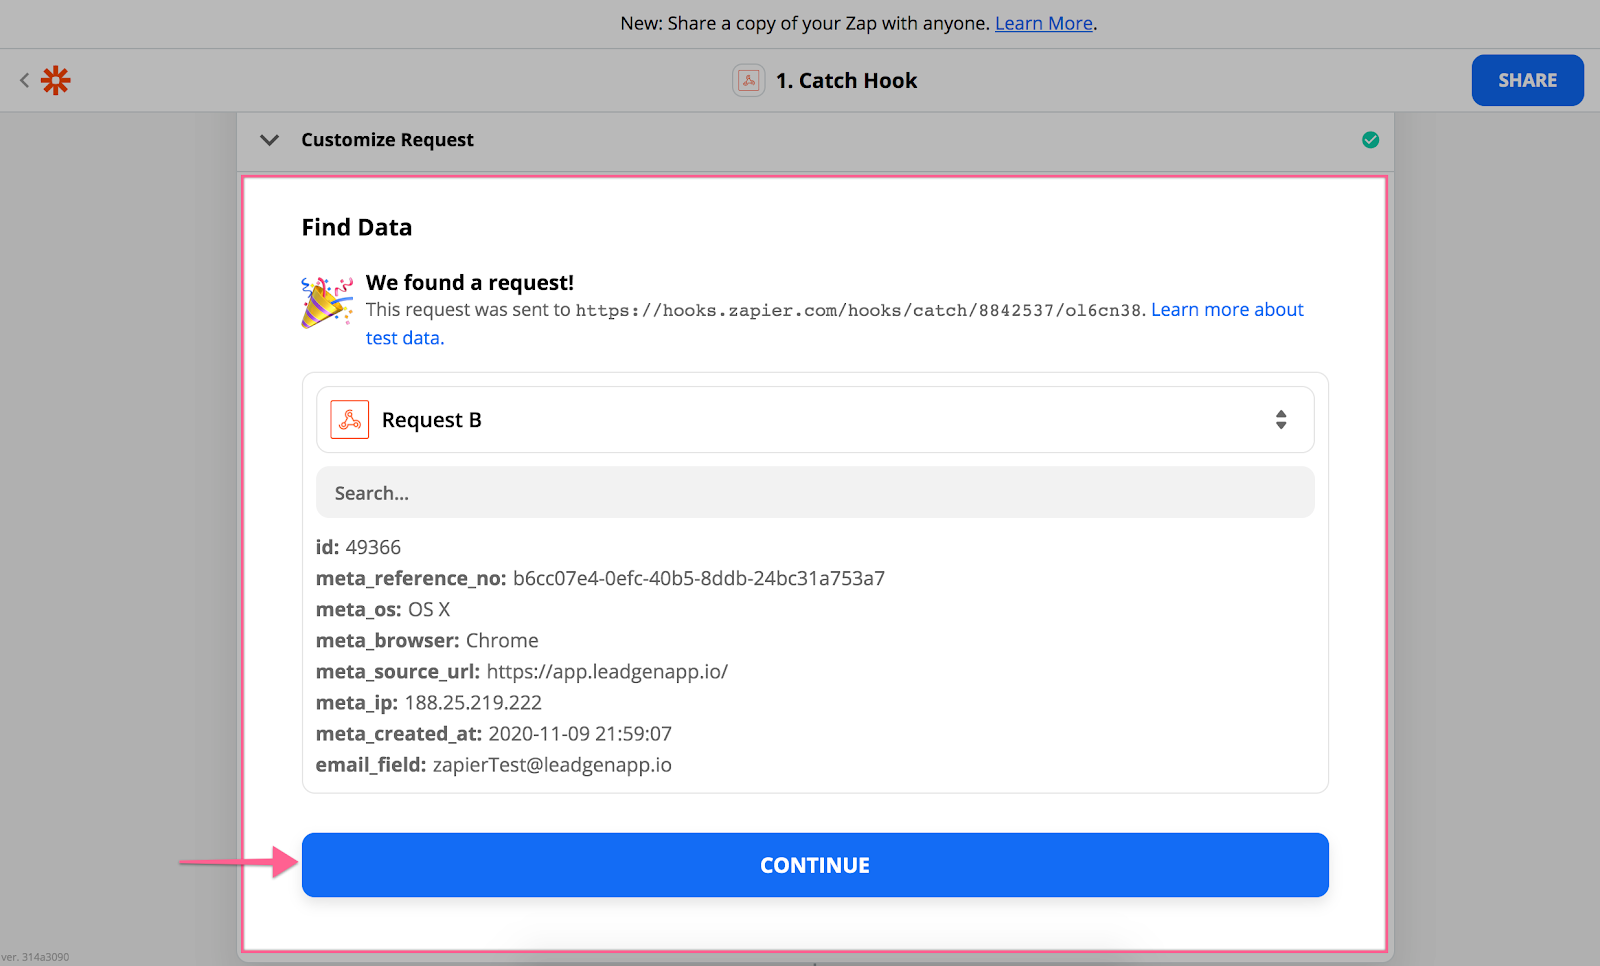
Open the live link of the form you created earlier in LeadGen and submit it to generate a lead. Then go back to Zapier and click on “Test webhook.” You should get a confirmation message almost instantly, showing you that the request from LeadGen was found.
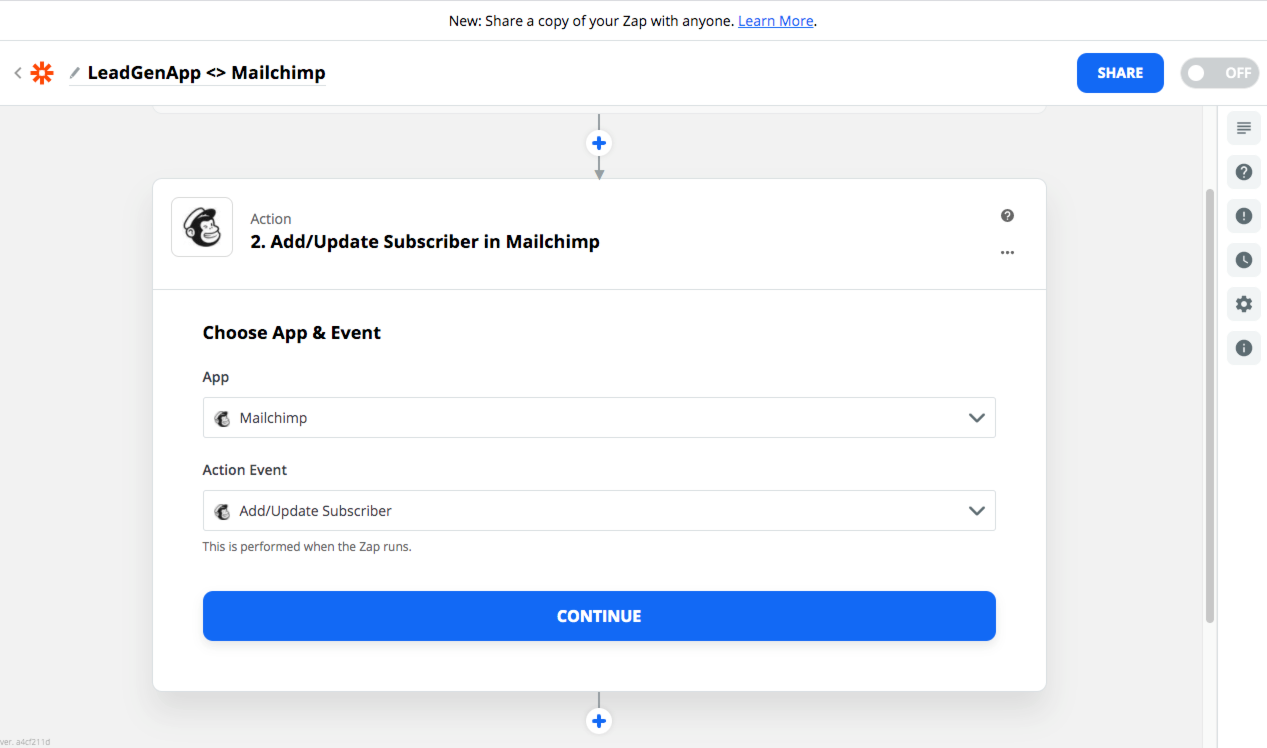
Now, everything you need to do is select the data destination. Let’s say you want to send the email address to an email marketing platform, like Mailchimp. Search for the platform in the list and select the action you want to do, in this case “Add/Update Subscriber.”
You need to login to Mailchimp to provide access to Zapier.
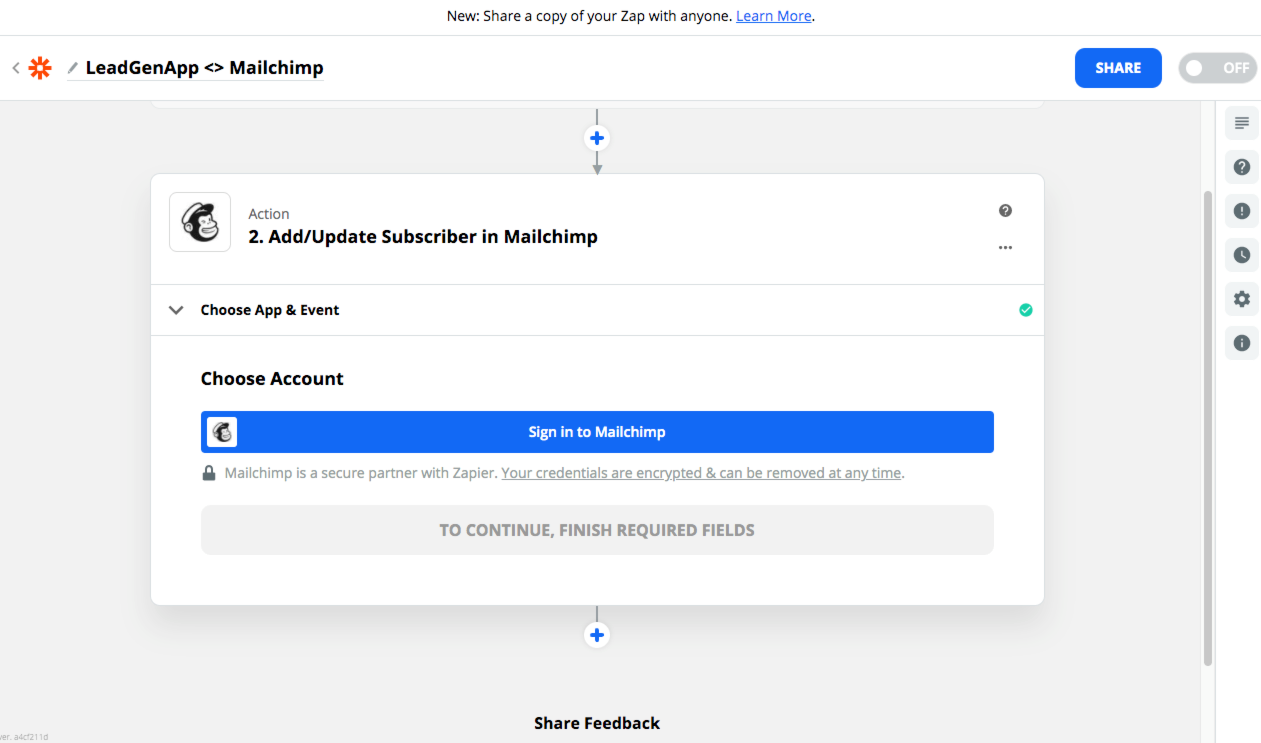
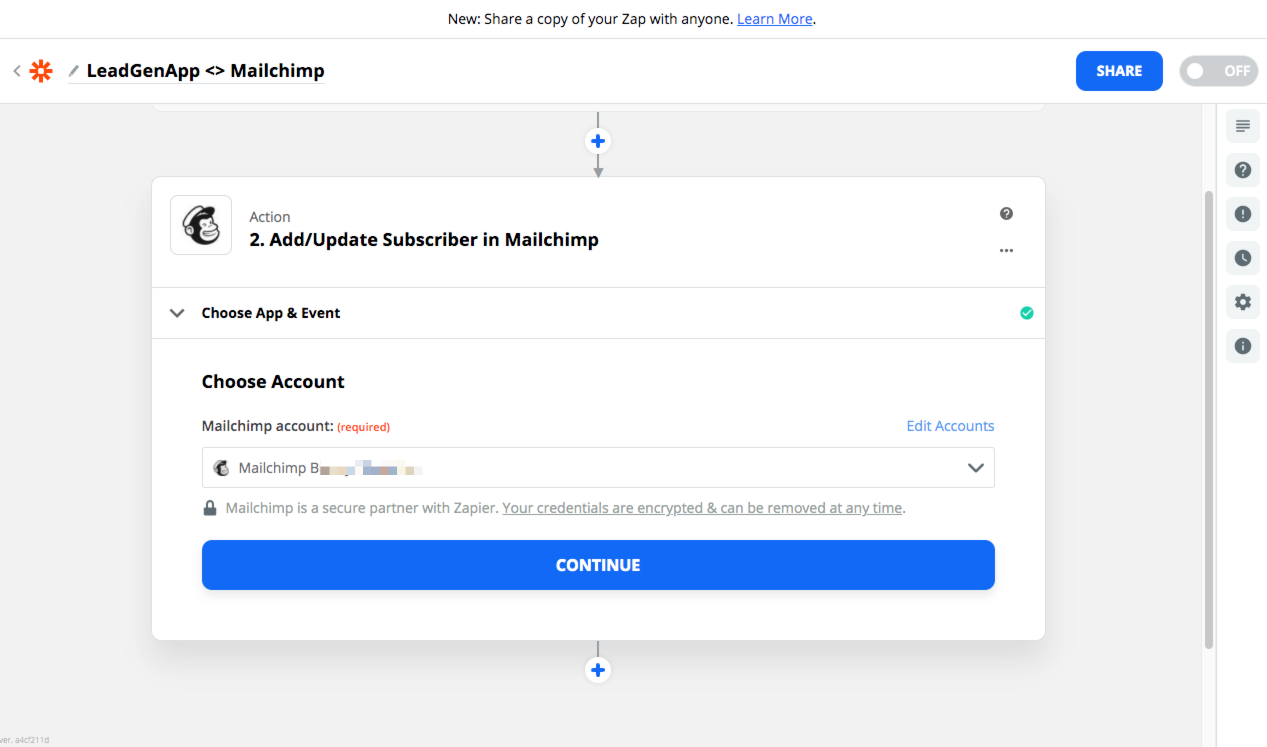
You will see a pop-up asking to confirm everything, and then you will return to Zapier, with your account listed in the dropdown menu. Click “Continue.”
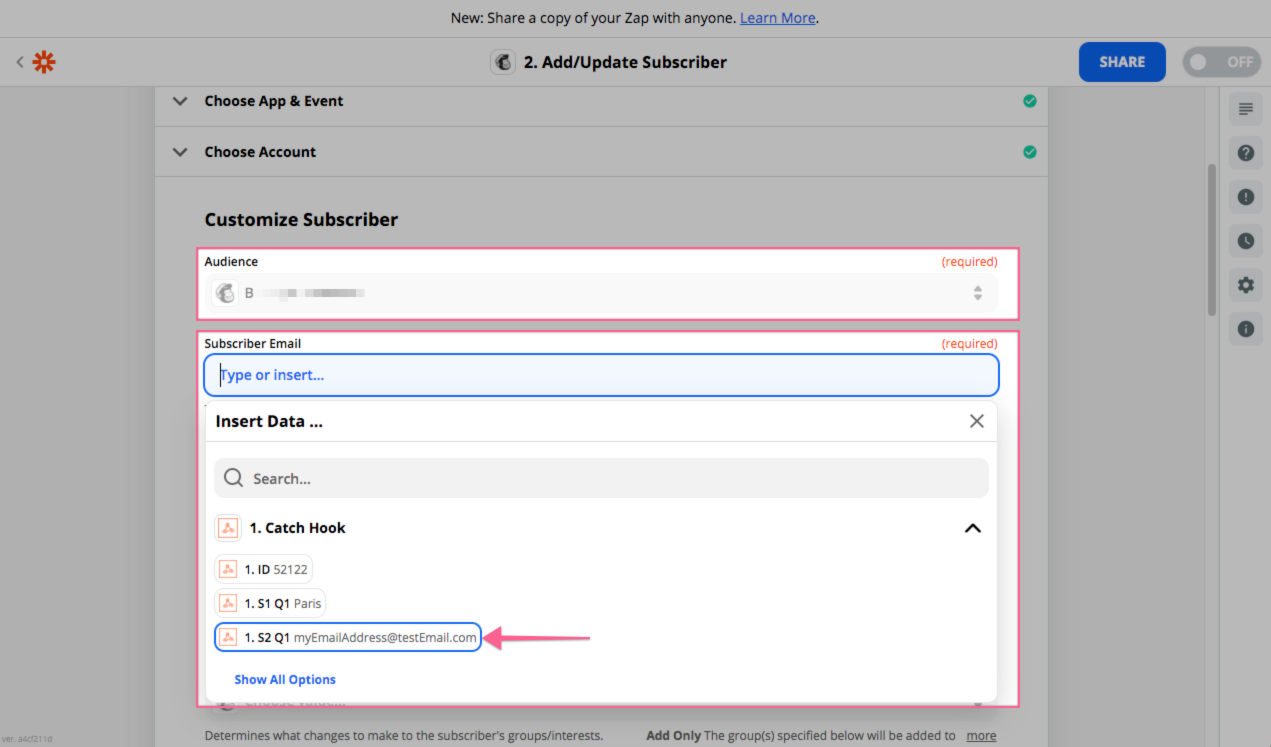
Now you need to select the information that will be sent to Mailchimp. In the first dropdown, called “Audience,” you need to select which list the new subscriber will go to. In the second dropdown, called “Subscriber Email,” you will see the information from the hook. Select the field that has the email address.
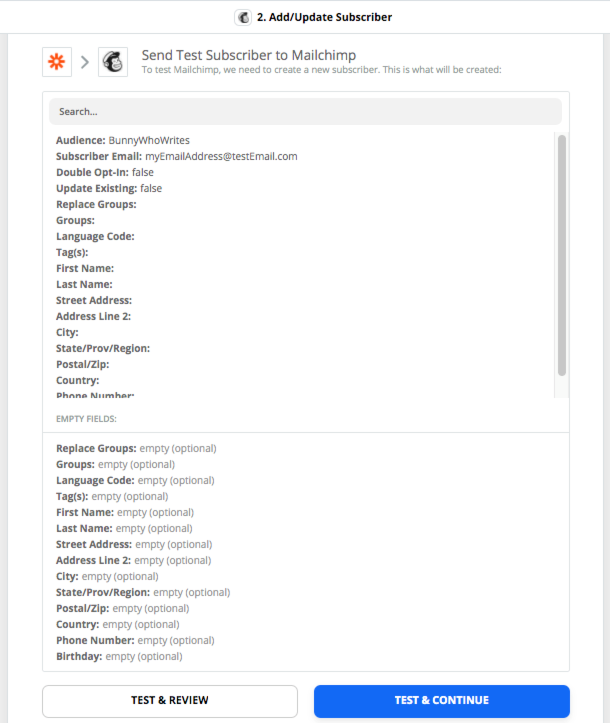
There are many more fields that can be sent into Mailchimp, you can see the list below. In this case, besides the email address, we’re also using two other fields, “Double Opt-In” and “Update existing,” both with the false value. The first one can trigger a confirmation email for the user to confirm the subscription to your list. The second one means that if the subscriber already exists in the list, the action will be skipped, and there will be no updates. When you finish mapping all the information you want to send from LeadGen to Mailchimp, click “Test & Continue.”
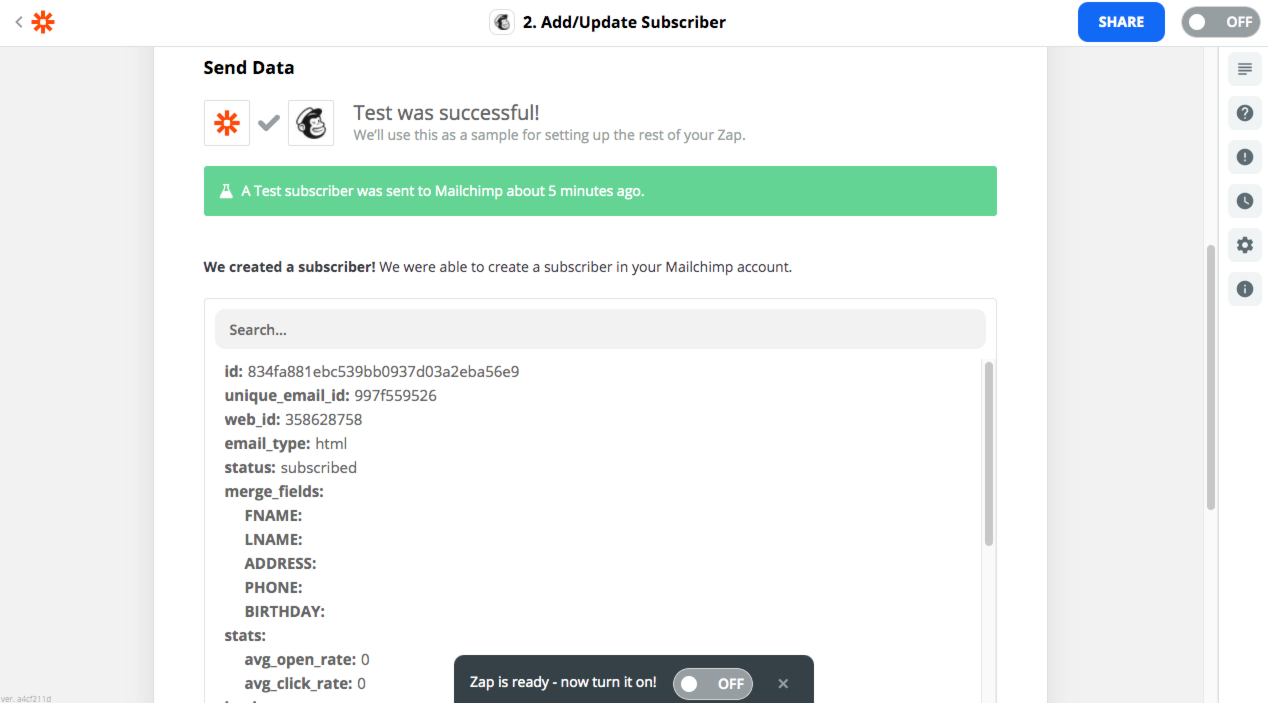
You will see a confirmation message that everything is working ok. At the bottom of the page, you have the option to turn the Zap on. You can do this now, or you can do it at a later date from Zapier’s dashboard.
