First, add all your form steps and questions into your form. Check if you have added all the questions needed for the calculator.
Now go back and click on the Edit form icon.

1. Assign choice values
While in the form editing menu, scroll down until you come across the “Show/Hide Choice Value” option and turn it on for all the questions that you want to include in the calculation of the score.
Each choice from the question can be assigned a value that will be used at the end to calculate the final value.
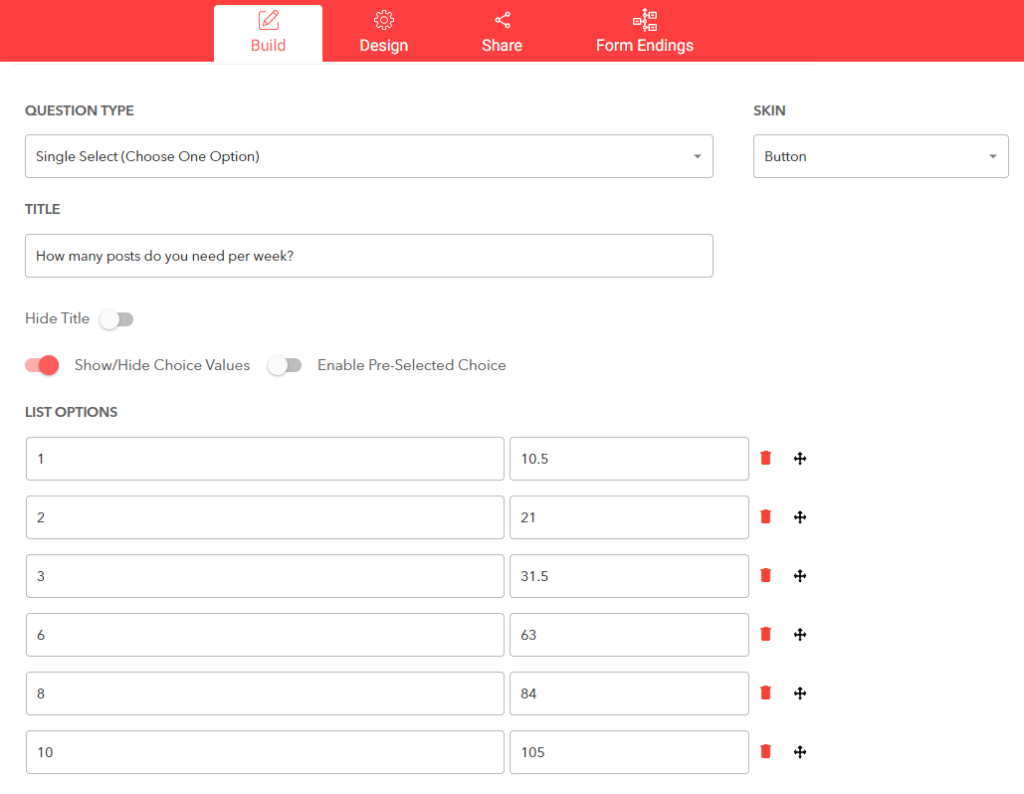
The choice value can be any numeric value, e.g. 1; 2.5, or 25000.
Every choice needs a value. You can add a “0” in case particular choices don’t count.
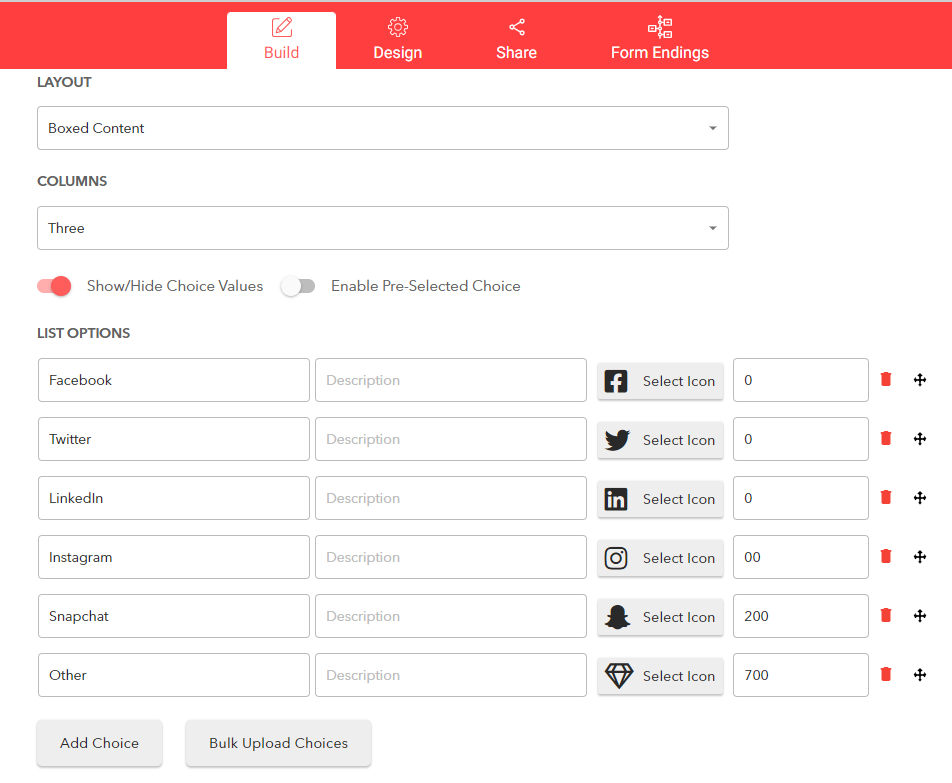
Here is an example: For the second question, The form visitor needs to select social media channels to advertise on. Some of the choices have been assigned a “0” value because the company is not interested in offering services. As you can see below, only three platforms have a value different than “0.”
2. Define the choice formula
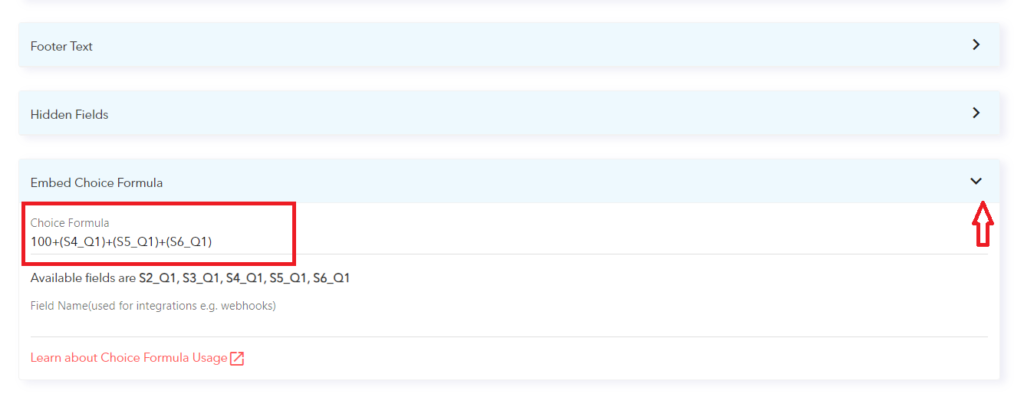
After adding the values, scroll down to the bottom of the form-builder and look for the “Embed choice formula” option. Click on it to expand it.
You will now see how the formula works, along with a couple of examples. The choice values from each question can be used by applying the structure:
S#_Q#
The “S” refers to the step and “Q” to the question.
If you have one question for each step, then you will have Q1 across the board.
For example: S1_Q1+S2_Q1+S3_Q1
Otherwise, if you have multiple questions per step, you will use S1_Q1, S1_Q2, S1_Q3, etc.
In the “Choice Formula” field, you have to type in the formula, just like you would in Excel or Sheets. Besides the values from the questions, different values can be used; in our example, we added “100” to the values from the questions.
3. Edit Thank-You Message
Open the form page and click on the “Form Endings”
Click on the edit icon next to the default ending.

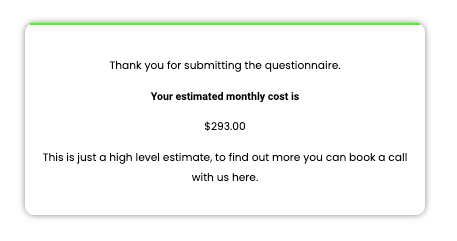
It can be added anywhere in the text using the syntax “$[choice_formula]. In the example below, it is used as an “estimated monthly cost” calculated based on the values of every question’s answer.
![It can be added anywhere in the text using the syntax “$[choice_formula].](https://leadgenapp.io/wp-content/uploads/2024/02/Helpcenter64.png)
After making all your desired settings, scroll to the bottom and click “Save settings.”
You can now return to the form page and click the preview icon. Complete the form, and you will see that the value from the formula will be included in the final “Thank you” message.
