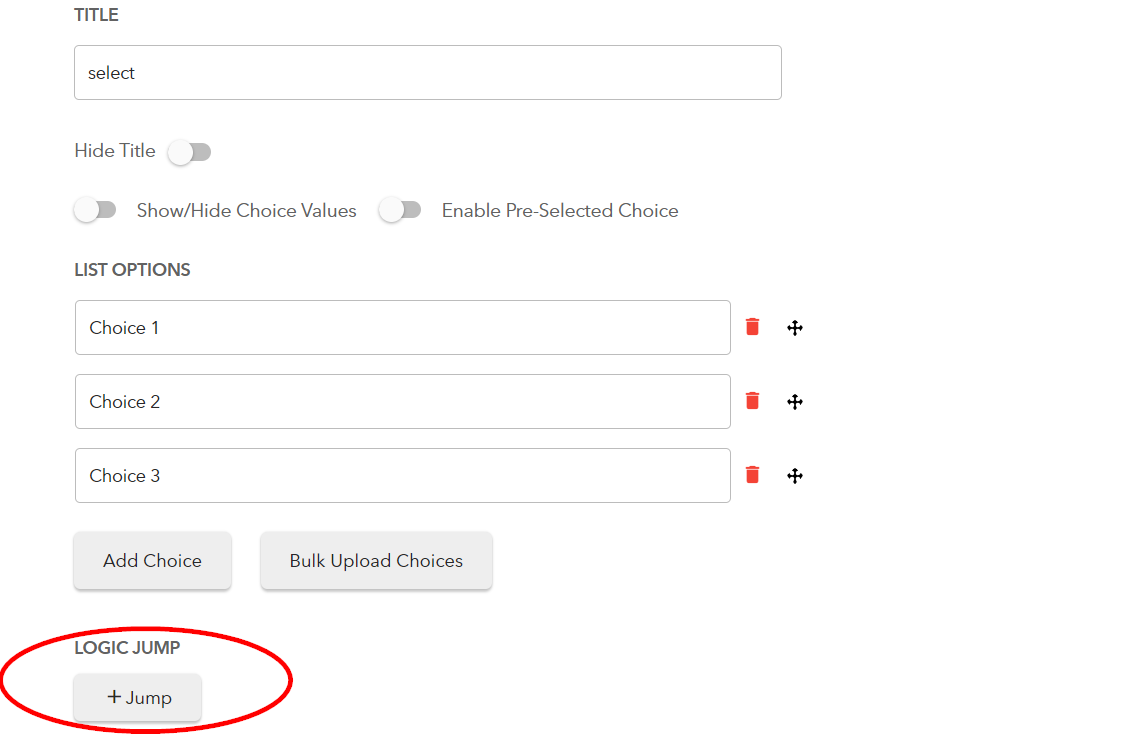
This post will show you how to design a multi-step form with a personalized ending using conditional logic with the ability to end the form so that certain visitors are not allowed to submit the form.
Before we go into the details, let’s first go through conditional logic. Simply put, when the user proceeds through stages or questions based on earlier selections, his entire experience is altered.
For example, if you respond “yes” to a question, you may be prompted to supply further information, but if you answer “No”, you may get a notification indicating that you do not qualify. A personalized flow based on the choices of the user can be built using the Conditional Logic Feature. Let’s discuss how you can achieve this.

1. To begin, add the final form step for unqualified leads (in this example, step 3) of your form, which will be a text box where you will enter your message for unqualified leads.

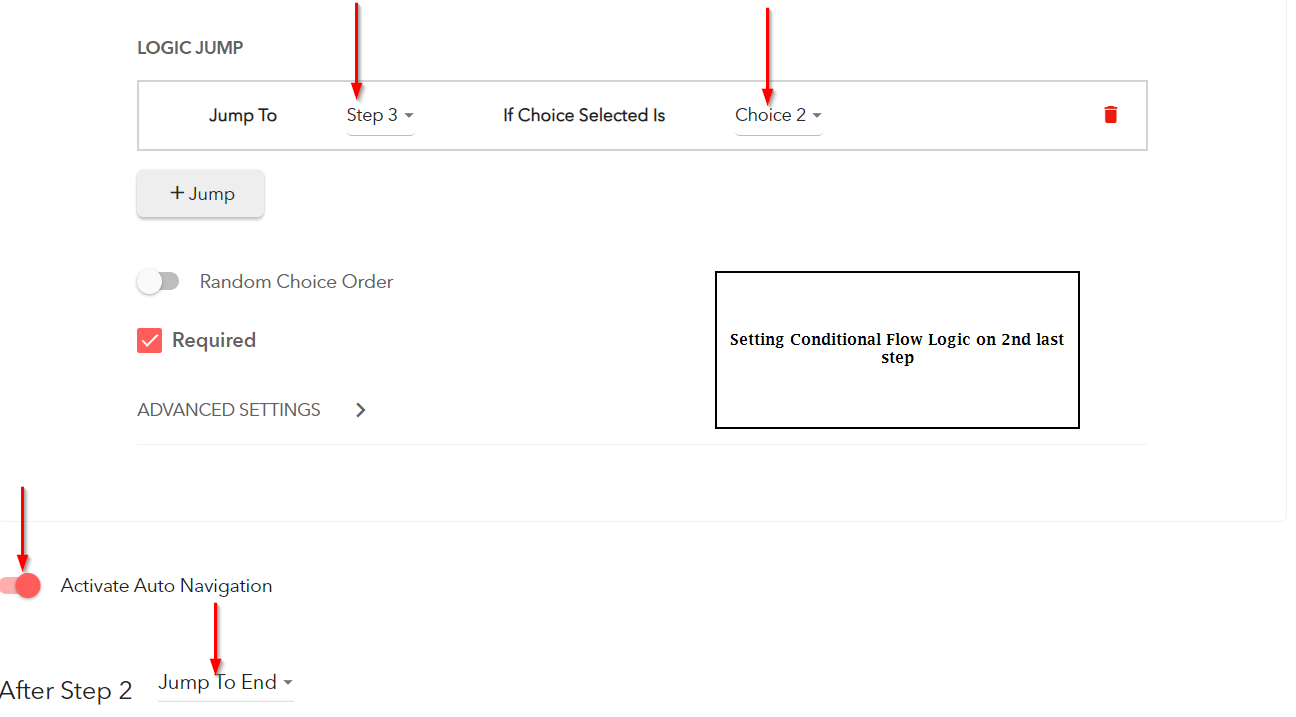
2. Then, on the previous/second-to-last step question (step 2 in this example), configure the conditional flow logic such that if visitors pick a certain option, they are routed to step 10. Set the auto navigation toggle to on at that point. Set the setting of After Step Jump to “End” as illustrated in the figure below:


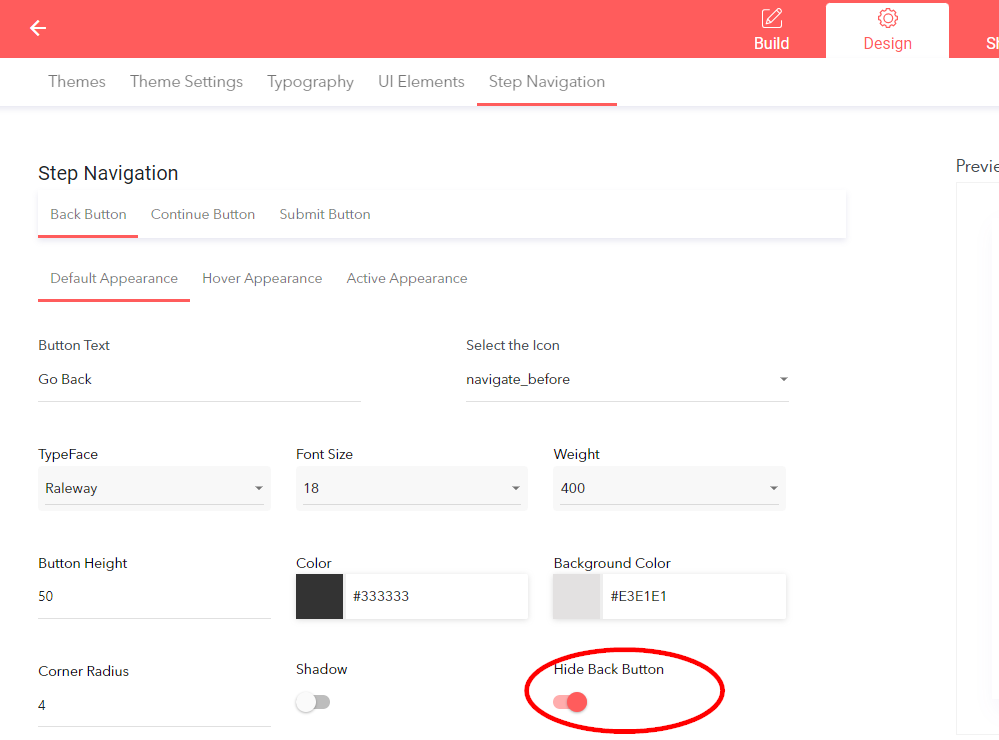
3. Next, you can hide the back button from the form, which ensures that on the form step 3, visitors land in a “dead end,” meaning they can no longer go back to avoid reaching the final form step for unqualified leads.
The navigation button settings are located in the design section.
– Go to Step Navigation >> Back Button >> Default Appearance, and set the Hide Back Button switch to invisible.

3.1. Also in the step navigation settings >> Continue Button >> Default Appearance, set the continue button to invisible for auto navigation. This will ensure that no continue button is visible on that step so users won’t reach the actual form end and will not be able to submit the form.