Having a consistent look and feel of your company’s branding is essential. That’s why we made it easy to apply your own company branding to LeadGen forms.
With LeadGen App, you can create multiple forms with the existing theme without wasting time recreating the design for each one.
To create the design for the first theme, you need to modify one of the existing forms. From your dashboard, click on “Forms”.
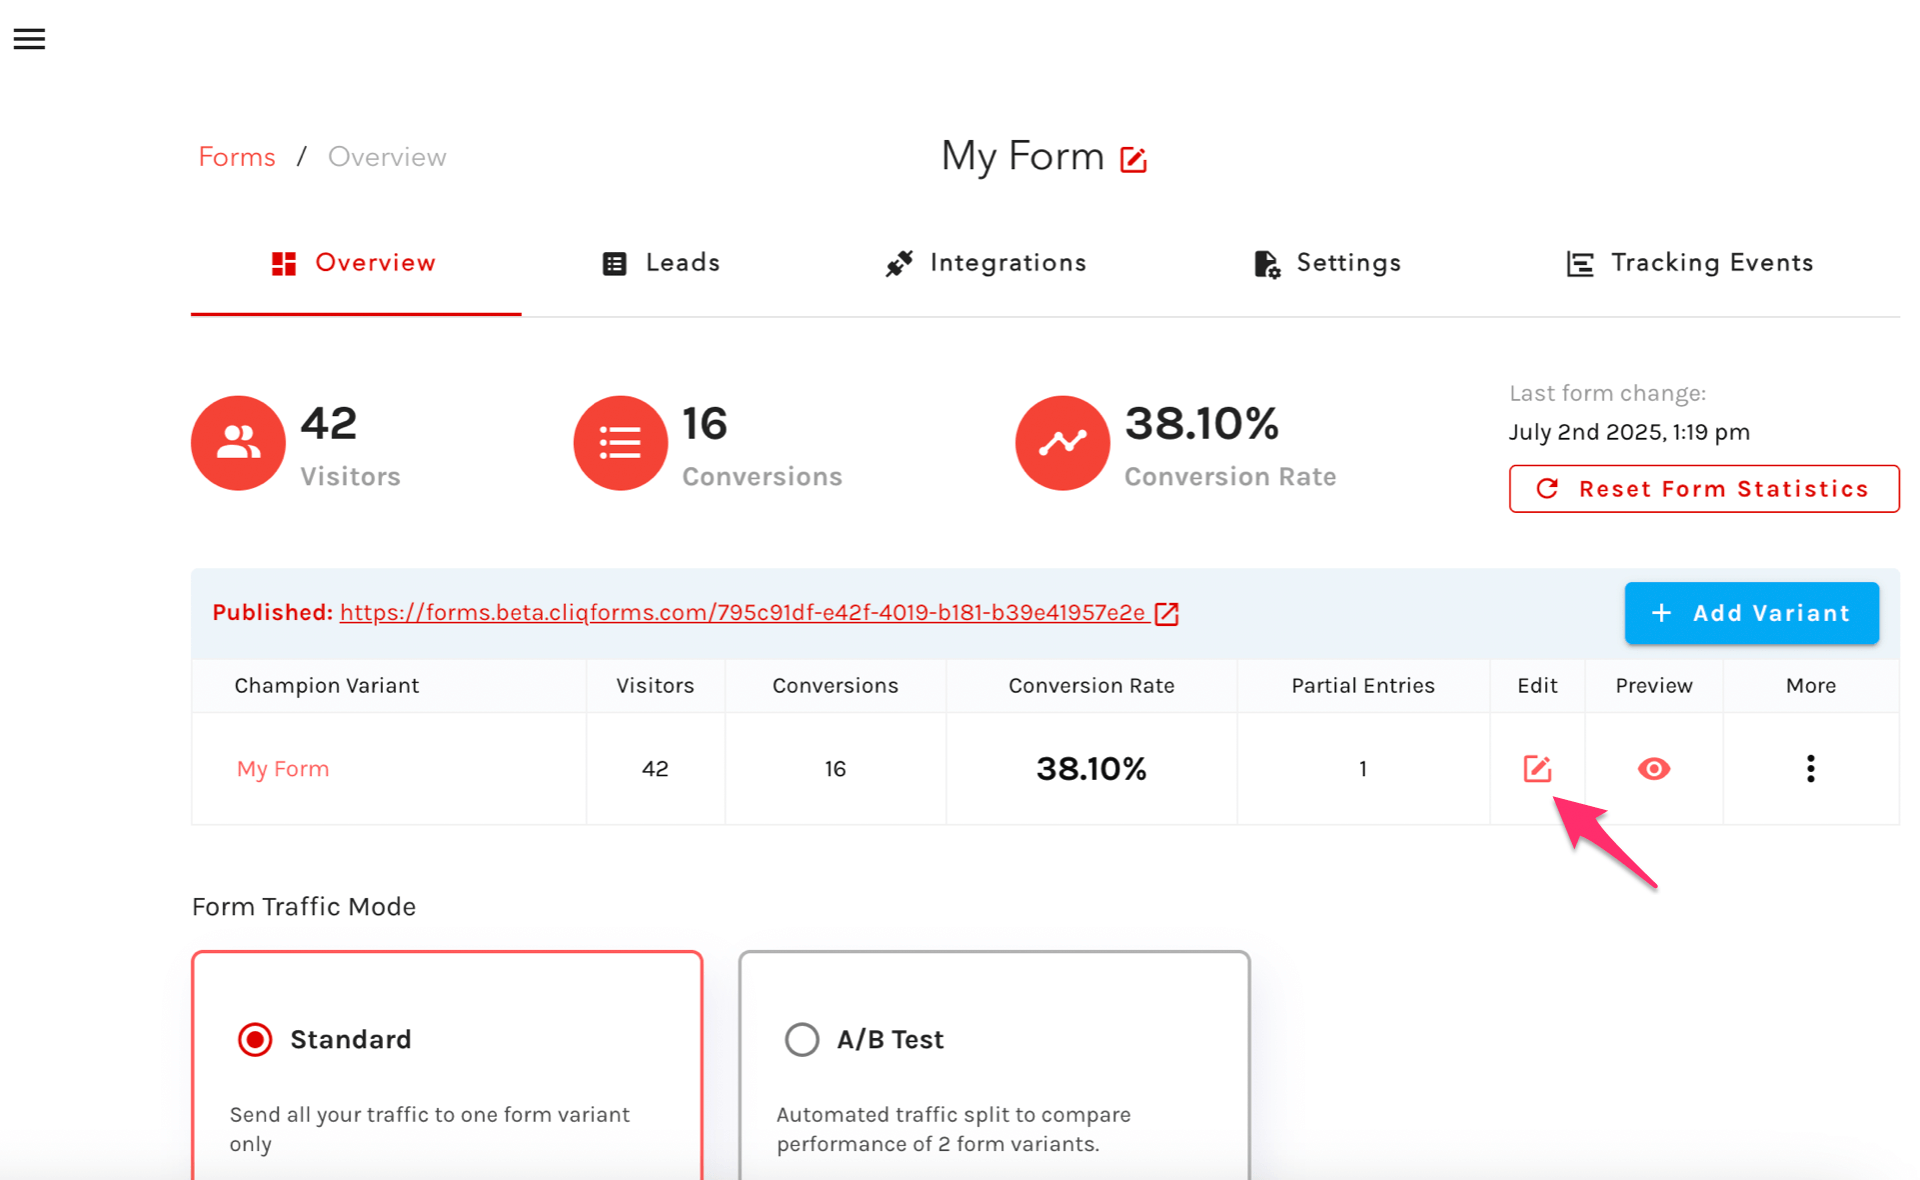
Click on the name of the form you want to change from the list or create a new form.
Next, you’ll want to open the editor, so click on the Edit icon.
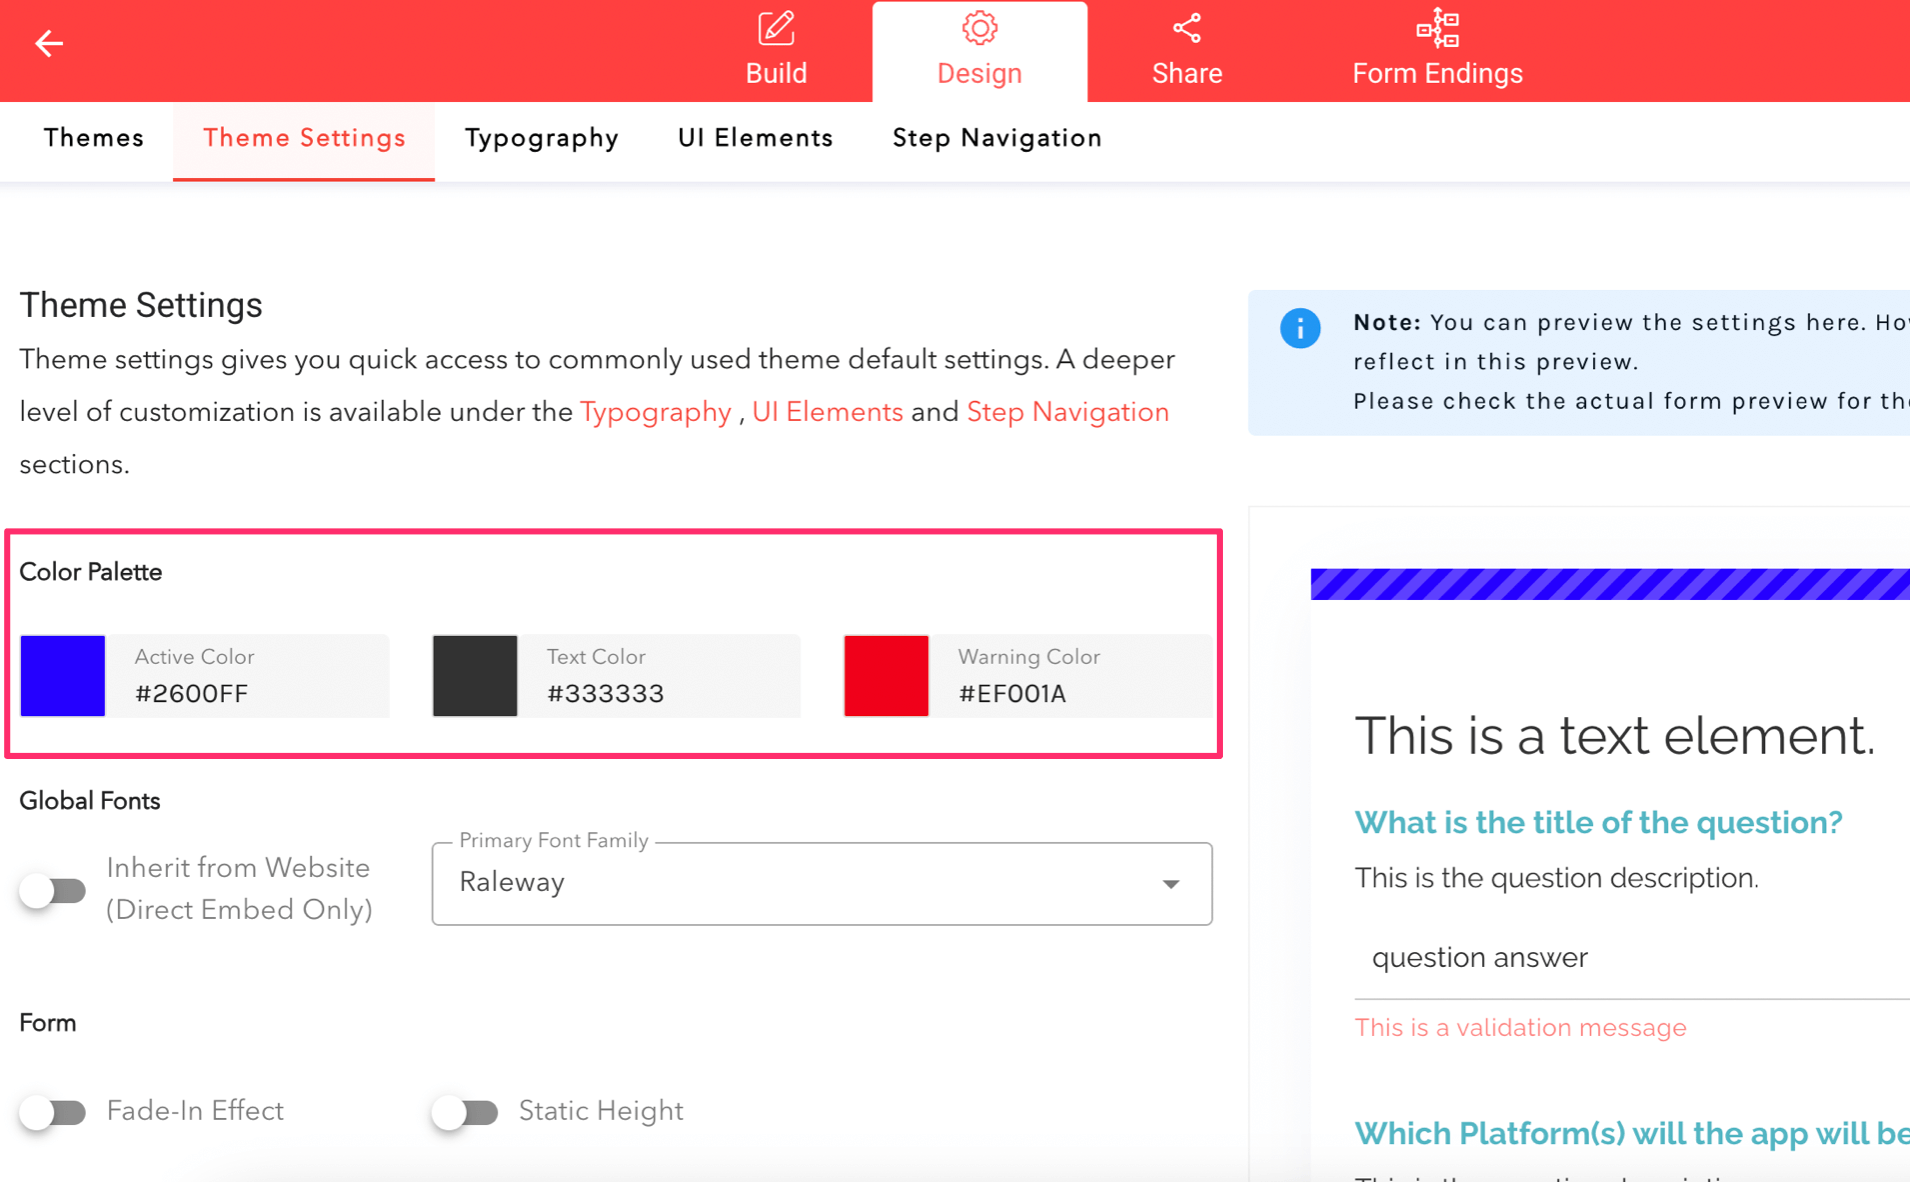
Since the goal is to change the form design, you need to access the “Design” section by clicking on the button in the header.
You can edit four big areas: the general theme settings, typography, visual elements, and the step navigation.
The main focus in the “Theme settings” is on the color palette, as shown in the print screen below. You have two color options for active and warning messages and another two options for the text – the color and the font family.
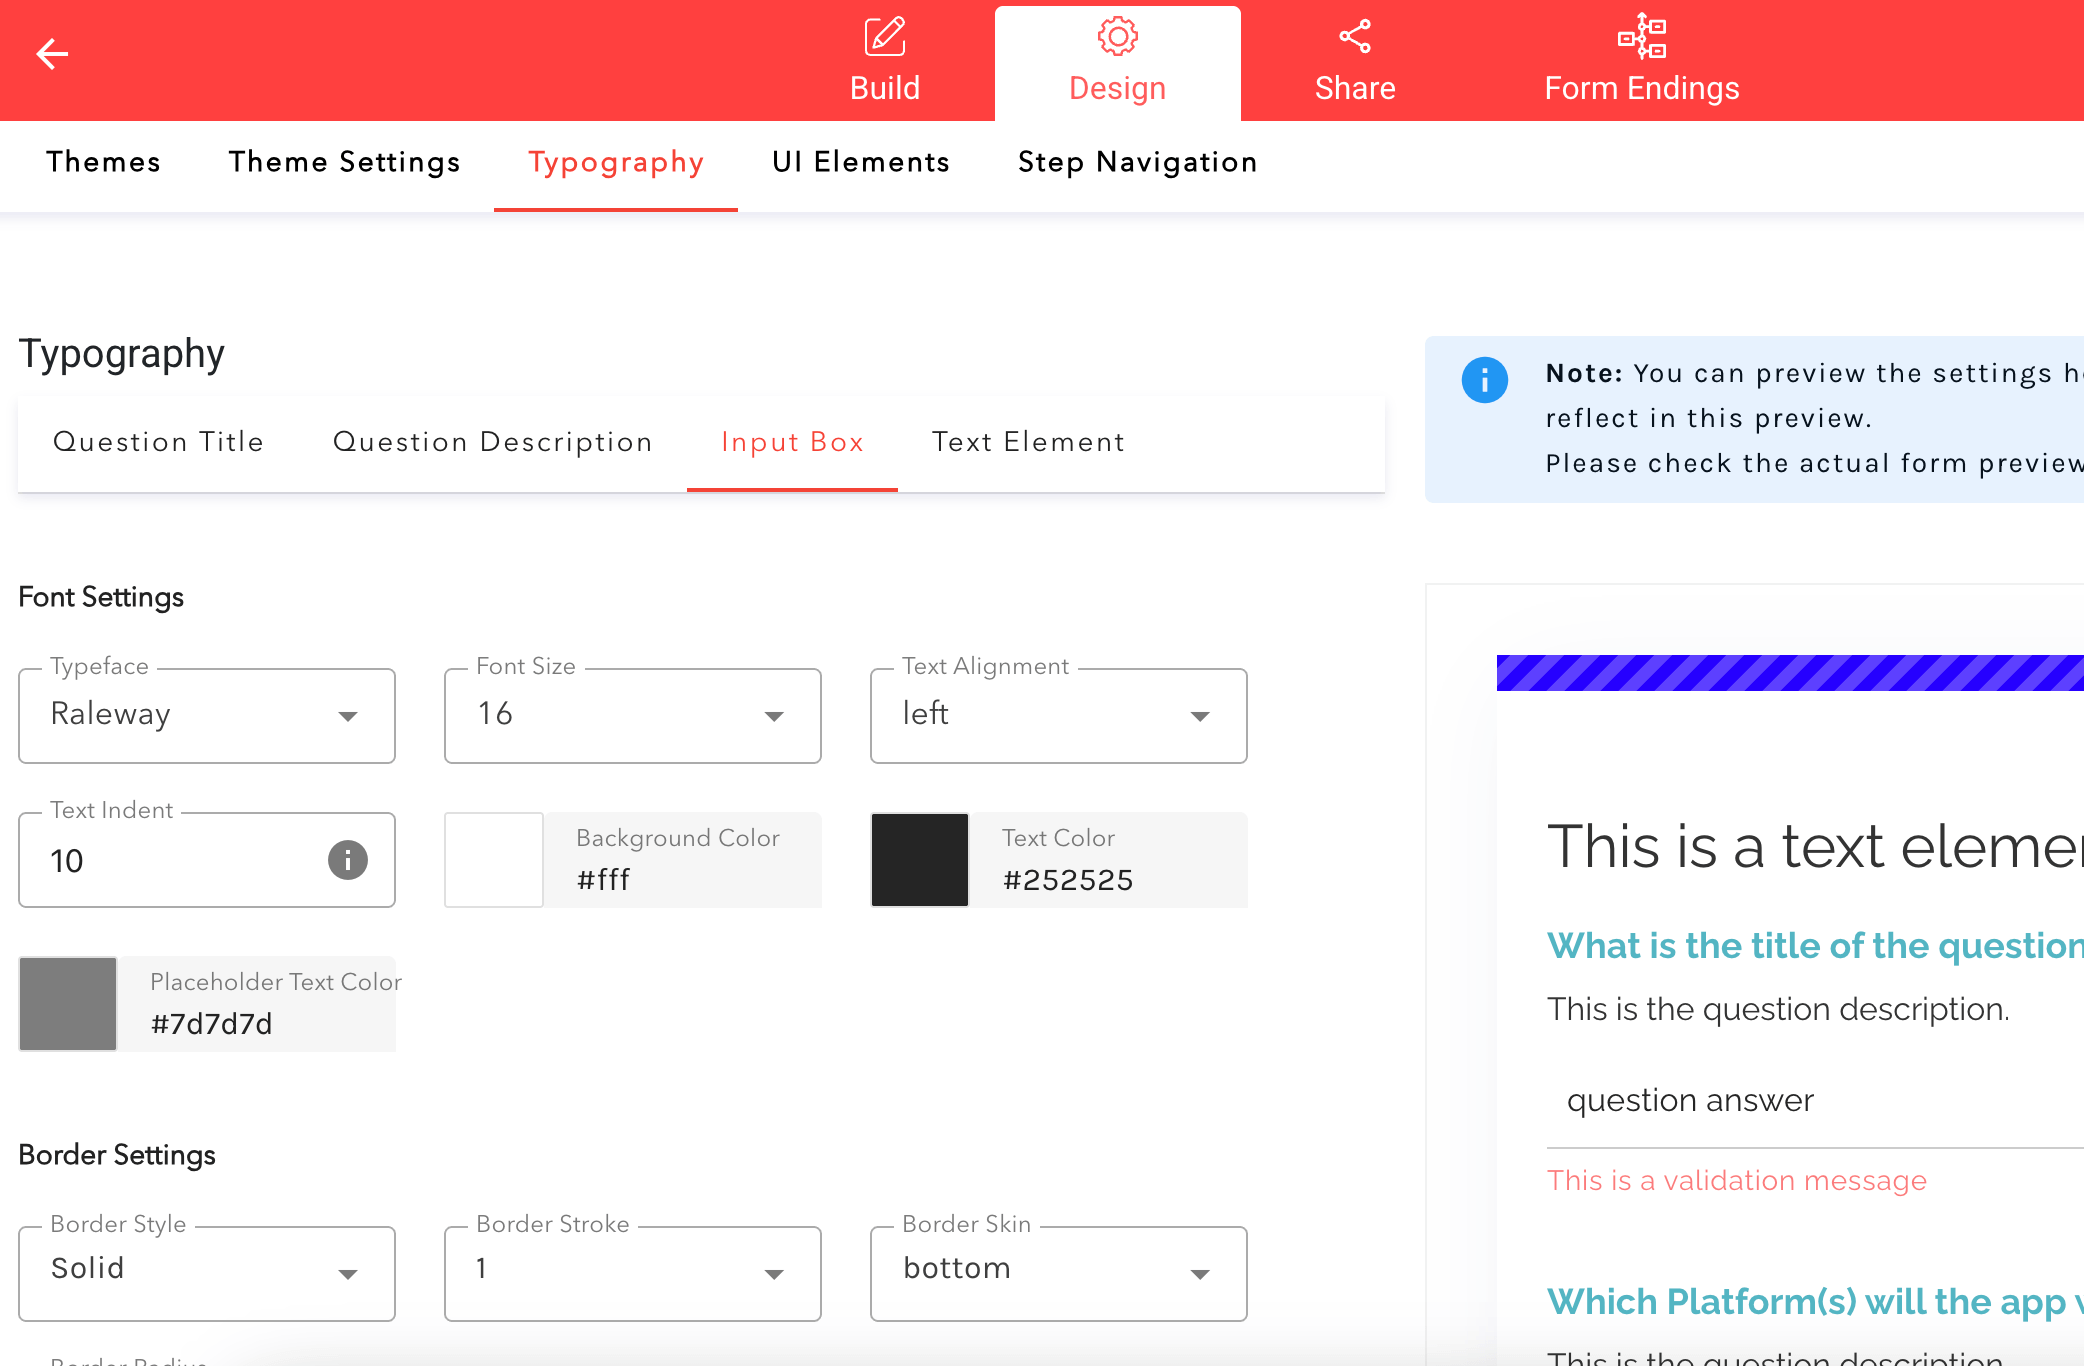
Once you set the main branding structure in theme settings, you can open up more of the design sections, like Typography or UI elements. In the “Typography” section, the personalization options are based on the form elements: the question title, question description, input box, and text element.
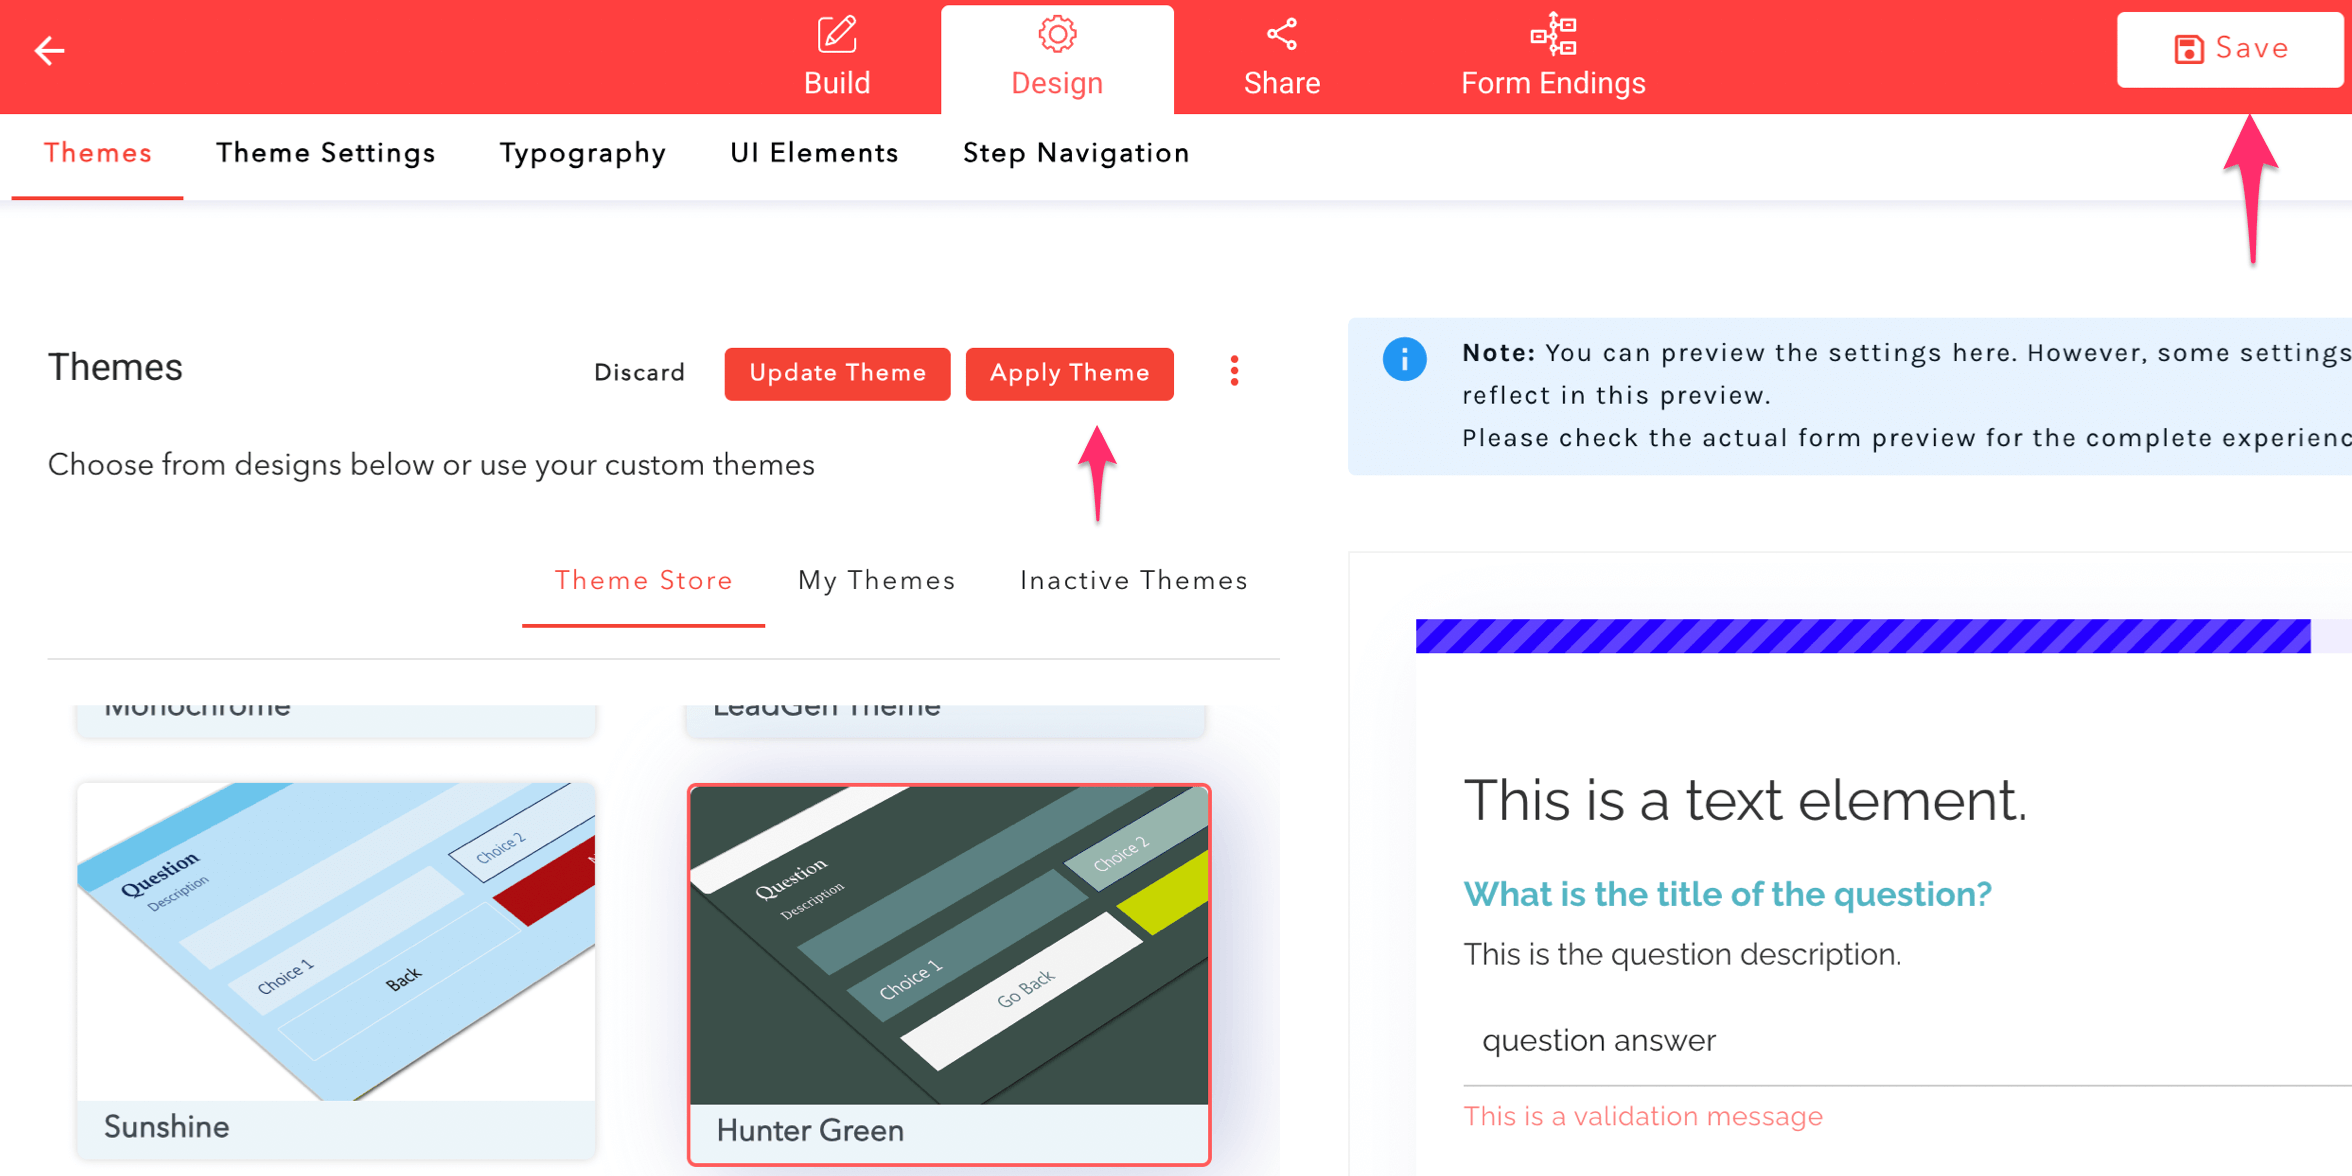
When you make all the needed adjustments, the last step is to save the theme for future use.
In the “Theme settings” section, at the bottom of the screen, under “Actions,” click on “Save as Custom Theme”.
Once it’s saved, it will appear underneath, in the newly created “Custom Themes” area, with the option to “Apply Theme”. In case you need it, you can have multiple themes saved, and see them all on this list.
Every time you create a new form, you can head over to the design section, theme settings (the above), scroll at the bottom, and click on “Apply Theme” to replicate those particular settings.


